Ultimate Local Development Setup with Angular, Firebase & Stripe
Building an eCommerce website is a complicated task. Especially when you have different services that need to communicate with each other. Here is the scenario where you don't have everything ready locally for development.
As in the title, the stacks that use to create an eCommerce site are:
Without Local Development Ability
Most of the reasons why you should set up the local development is TIME SAVING, and TIME is $$$.
- Authentication is done directly to your firebase project
- If you are using Webhook, cloud functions deployment takes time & money - especially for starters
- Database activities are eating your free tire— and you shouldn't work with production data
Without Local Development Ability
What happens in Local, Stays in Local - not for Stripe payment record for development.
Angular & Firebase Emulators Setup
I'm not are going into detail on how to create a new Angular project. Suppose that you already have a working Angular project with @angular/fire in your package.json
// app.module.ts
import { AngularFireAuthModule, USE_EMULATOR as USE_AUTH_EMULATOR } from '@angular/fire/auth'
import { AngularFirestoreModule, USE_EMULATOR as USE_FIRESTORE_EMULATOR } from '@angular/fire/firestore'
import { AngularFireFunctionsModule, USE_EMULATOR as USE_FUNCTIONS_EMULATOR } from '@angular/fire/functions'

....
providers: [
    AuthService,
    {
      provide: USE_AUTH_EMULATOR,
      useValue: environment.useEmulators ? ['localhost', 9099] : undefined,
    },
    {
      provide: USE_FIRESTORE_EMULATOR,
      useValue: environment.useEmulators ? ['localhost', 8080] : undefined,
    },
    {
      provide: USE_FUNCTIONS_EMULATOR,
      useValue: environment.useEmulators ? ['localhost', 5001] : undefined,
    },
  ],
Make sure to check your emulators ports in the firebase.json file.
// firebase.json

"emulators": {
    "firestore": {
      "port": "8080"
    },
    "ui": {
      "enabled": true,
      "host": "localhost",
      "port": 4001
    },
    "functions": {
      "port": "5001"
    },
    "database": {
      "port": "9000"
    },
    "pubsub": {
      "port": "8085"
    },
    "auth": {
      "port": 9099
    },
    "hosting": {
      "port": 5000
    }
  }
Then when you run emulators for firebase functions, the Angular project will use local emulators for handling authentication, database, functions…
firebase emulators:start
Stripe Setup
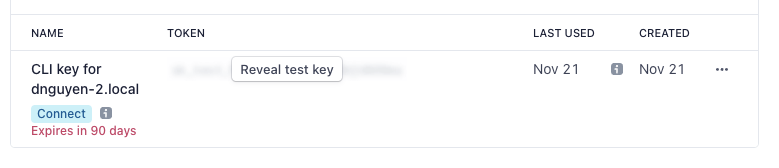
First, you need to install Stripe CLI and use stripe login in order to authenticate.
Forward events to your local server:
dalenguyen$ stripe listen --forward-to localhost:5000/api-stripe
A newer version of the Stripe CLI is available, please update to: v1.7.8
> Ready! Your webhook signing secret is whsec_gD8ixxxnxxxg1tv (^C to quit)
Then you can trigger an event via a local trigger:
dalenguyen$ stripe trigger payment_intent.created
A newer version of the Stripe CLI is available, please update to: v1.7.8
Setting up fixture for: payment_intent
Trigger succeeded! Check dashboard for event details.

----> on another terminal
2021-11-21 10:34:54
--> payment_intent.created [evt_3JyI49ESKh0WH3011opuksXb]
2021-11-21 10:34:54  <--  [200] POST http://localhost:5000/api-stripe [evt_3JyI49ESKh0WH3011opuksXb]

----> on firebase functions log
i  functions: Beginning execution of "us-central1-api-stripe"
>  stripeObjectid pi_3JyI49ESKh0WH3011Hl3lDrr
i  functions: Finished "us-central1-api-stripe" in ~1s
Now, everything is ready for development. Everything happens locally on your machine.
Testing Stripe Webhooks
When you forward events to the local machine. All webhooks events will be forwarded to Firebase emulators functions.
For example, you create a Stripe Checkout Session, they pay for that session. Then the webhooks will be triggered from the Stripe dashboard. Then on your local machine, the event will be triggered on your Stripe terminal & firebase emulator functions.
---> stripe terminal
2021-11-21 11:25:52   --> customer.created [evt_1JyIrUESKh0WH301SrYeIZkg]
2021-11-21 11:25:52   --> payment_intent.succeeded [evt_3JyIpzESKh0WH3011OWfb84B]
2021-11-21 11:25:53   --> charge.succeeded [evt_3JyIpzESKh0WH30115gKa8GM]
2021-11-21 11:25:53   --> checkout.session.completed [evt_1JyIrVESKh0WH301osTVBhQI]
2021-11-21 11:25:54  <--  [200] POST http://localhost:5000/api-stripe [evt_1JyIrUESKh0WH301SrYeIZkg]
2021-11-21 11:25:54  <--  [200] POST http://localhost:5000/api-stripe [evt_3JyIpzESKh0WH30115gKa8GM]
2021-11-21 11:25:54  <--  [200] POST http://localhost:5000/api-stripe [evt_3JyIpzESKh0WH3011OWfb84B]
2021-11-21 11:25:54  <--  [200] POST http://localhost:5000/api-stripe [evt_1JyIrVESKh0WH301osTVBhQI]
Follow me on Twitter for the latest content on Angular, JavaScript & WebDevelopment 👐
Get new posts in your inbox
No spam — just new posts and learning pages when they ship.